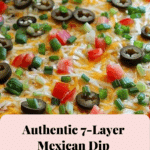
Why You’ll Love This Recipe
This 7-Layer Mexican Dip is the ultimate party dip—packed with bold, zesty flavors and textures that complement each other perfectly. The combination of creamy layers with fresh salsa, tangy guacamole, and hearty beans makes it irresistibly delicious. It’s quick to assemble, and the best part is that you can customize each layer to suit your taste. Whether you’re serving it with tortilla chips, veggies, or crackers, this dip is always a hit and will have everyone coming back for more!
Ingredients
(Tip: You’ll find the full list of ingredients and measurements in the recipe card below.)
-
1 can (15 oz) refried beans (or black beans for a healthier option)
-
1 packet taco seasoning (or homemade taco seasoning)
-
1/2 cup sour cream
-
1/2 cup mayonnaise (or Greek yogurt for a lighter option)
-
1 cup guacamole (store-bought or homemade)
-
1 cup salsa (chunky or smooth, based on preference)
-
1 1/2 cups shredded cheddar cheese (or Mexican cheese blend)
-
1 cup lettuce, shredded
-
1/4 cup black olives, sliced (optional)
-
1/4 cup green onions, chopped
-
Jalapeño slices (optional, for extra heat)
Directions
-
Prepare the beans: In a small bowl, mix the refried beans with the taco seasoning. Spread the seasoned refried beans evenly at the bottom of a 9×9-inch or 9×13-inch serving dish (depending on how many servings you need).
-
Layer the sour cream and mayo mixture: In a separate bowl, mix the sour cream and mayonnaise (or Greek yogurt) until smooth. Spread the sour cream mixture evenly over the beans layer.
-
Add the guacamole: Spread the guacamole layer evenly on top of the sour cream and mayo mixture.
-
Add the salsa: Spoon the salsa over the guacamole, spreading it evenly. You can use mild, medium, or spicy salsa based on your heat preference.
-
Top with cheese: Sprinkle the shredded cheddar cheese (or Mexican cheese blend) evenly on top of the salsa layer.
-
Add shredded lettuce: Top with a generous layer of shredded lettuce for a fresh crunch.
-
Garnish: Garnish with sliced black olives, chopped green onions, and optional jalapeño slices for added flavor and spice.
-
Chill and serve: Refrigerate the dip for at least 30 minutes to allow the layers to set and the flavors to meld. Serve with tortilla chips, crackers, or fresh veggies.
Servings and timing
This recipe serves about 6-8 people. Prep time is around 15 minutes, and chilling time is at least 30 minutes for the best flavor.
Variations
-
Use ground beef or chicken: Add a layer of cooked ground beef, chicken, or turkey seasoned with taco seasoning for a heartier version.
-
Make it vegetarian: Omit the meat and use black beans or refried beans for a completely vegetarian dip.
-
Spicy version: Add more jalapeños, hot salsa, or a dash of hot sauce to the layers to increase the heat.
-
Dairy-free version: Use dairy-free sour cream, cheese, and mayo alternatives to make the dip dairy-free.
Storage/reheating
Store leftover dip in an airtight container in the refrigerator for up to 2-3 days. This dip is best served cold, so it doesn’t need to be reheated. The layers may separate slightly over time, but the flavors will still be delicious.
FAQs
1. Can I use homemade refried beans?
Yes, homemade refried beans work wonderfully in this dip and will add an extra layer of flavor. Just make sure the beans are well-seasoned.
2. Can I use Greek yogurt instead of sour cream?
Yes, Greek yogurt is a great, healthier substitute for sour cream and will add a slight tang to the dip.
3. Can I make this dip ahead of time?
Absolutely! You can assemble the dip a few hours before serving and refrigerate it until you’re ready to serve. Just be sure to garnish the lettuce and olives just before serving to keep them fresh.
4. Can I make this dip spicy?
Yes! Add jalapeños, hot salsa, or a dash of chili powder to the layers for extra heat.
5. Can I use different types of cheese?
Yes, you can use any cheese you like, such as Monterey Jack, pepper jack, or even cotija for a more authentic Mexican flavor.
6. What can I serve with this dip?
Tortilla chips are the classic choice, but you can also serve the dip with fresh veggies (like cucumber or carrot sticks), crackers, or pita chips.
7. Can I use a different type of salsa?
Yes, you can use any kind of salsa you prefer—chunky, smooth, roasted, or even pico de gallo for a fresh twist.
8. Is this dip gluten-free?
Yes, this 7-layer dip is naturally gluten-free as long as you use gluten-free tortilla chips and taco seasoning.
9. Can I use low-fat or fat-free ingredients?
Yes, you can substitute low-fat or fat-free sour cream, mayo, and cheese to reduce the fat content, though the texture and flavor may be slightly different.
10. Can I make this dip without the olives?
Yes, olives are optional, so feel free to skip them if you’re not a fan or if you prefer a milder taste.
Conclusion
Authentic 7-Layer Mexican Dip is a perfect combination of bold, fresh, and savory flavors. With layers of seasoned beans, creamy dressing, flavorful salsa, and cheese, it’s a dip that’s guaranteed to be a hit at any gathering. Whether you’re making it for a party, holiday, or just because, this dish is easy to make, full of flavor, and always disappears quickly! Enjoy it with chips, veggies, or your favorite dippables, and it’s sure to be a crowd favorite every time!

Authentic 7-Layer Mexican Dip
- Prep Time: 20 minutes
- Cook Time: 5 minutes
- Total Time: 20-25 minutes
- Yield: 6-8 servings
- Category: Appetizer
- Method: Chilling
- Cuisine: Mexican
- Diet: Vegetarian
Description
Spring Roll Salad with Peanut Dressing is a fresh, gluten-free twist on traditional spring rolls, served in a bowl with rice noodles, crunchy vegetables, and a creamy peanut dressing. Packed with flavor and texture, this salad is perfect for lunch, dinner, or meal prep. It’s a light, satisfying, and healthy option that’s easily customizable with protein of choice.
Ingredients
For the salad:
-
6 oz rice noodles (vermicelli or thin rice sticks)
-
1 cup shredded carrots
-
1 cup shredded purple cabbage
-
1 red bell pepper, thinly sliced
-
1 cucumber, julienned or spiralized
-
1/2 cup fresh mint leaves
-
1/2 cup fresh cilantro leaves
-
1/4 cup chopped green onions
-
Optional toppings: chopped peanuts, sesame seeds, sliced avocado
For the gluten-free peanut dressing:
-
1/4 cup creamy peanut butter
-
2 tablespoons gluten-free soy sauce or tamari
-
1 tablespoon rice vinegar
-
1 tablespoon lime juice (freshly squeezed)
-
1 tablespoon maple syrup or honey
-
1 clove garlic, minced
-
1 teaspoon grated fresh ginger
- 1–2 tablespoons warm water (to thin dressing as needed)
Instructions
-
Cook the noodles: Cook the rice noodles according to the package instructions. Drain and rinse under cold water to stop the cooking. Set aside.
-
Prepare the dressing: In a small bowl, whisk together peanut butter, gluten-free soy sauce (or tamari), rice vinegar, lime juice, maple syrup, garlic, and ginger. Gradually add warm water to thin the dressing to your desired consistency.
-
Assemble the salad: In a large mixing bowl, combine the cooked rice noodles, shredded carrots, cabbage, bell pepper, cucumber, mint, cilantro, and green onions. Toss gently to combine.
-
Add dressing: Drizzle the peanut dressing over the salad and toss to coat. Start with half the dressing and add more as needed to suit your taste.
-
Serve: Divide the salad into bowls and top with optional toppings like chopped peanuts, sesame seeds, or sliced avocado. Serve immediately or refrigerate for later.
Notes
Add Protein: Top the salad with grilled chicken, shrimp, tofu, or edamame for a heartier meal.Spicy Version: Add sriracha or chili flakes to the dressing for extra heat.Nut-Free Option: Substitute peanut butter with sunflower seed butter or tahini to make the dressing nut-free.Make Ahead: Prep all the components in advance and store separately. Assemble and dress just before serving for the best texture.
